
This is a written explanation of how I was taught to perform Group Lockout and how to manage contractors working on-site under a Group Lockout. There are many things in this document that are NOT required by OSHA; however, they are in the program to ensure compliance with OSHA’s minimum expectations. We did it this way after many near misses over my career involving “group LOTO” and contractors.
When multiple employees are working on the equipment/machinery, we can utilize Group Lockout practices that will achieve the same level of safety but save time and reduce the number of locks necessary to achieve a FULL LOCKED OUT status for each authorized employee associated with the work.
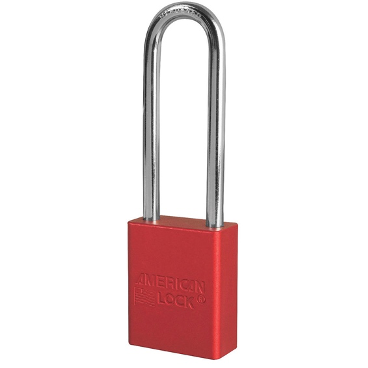
This procedure will utilize our BLUE – Field lockout locks and our RED – Personal lockout locks.
|
RED – PERSONAL LOCKOUT LOCK |
BLUE – FIELD LOCKOUT LOCK |
|
MUST BE INDIVIDUALLY KEYED* |
May be Keyed Alike |
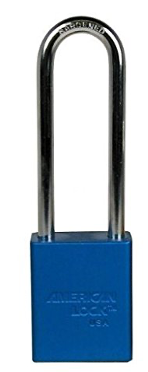
*These Personal LO locks may be keyed alike within the set issued to an INDIVIDUAL. For example, if Authorized Personnel gets five (5) Personal LO locks issued to them, all five (5) Personal LO locks could be keyed alike. The key fits ONLY those five (5) locks and NO OTHER set of locks. This can be easier for the owner of the locks by having only a single key on their key chain rather than five keys. Never forget… WHENEVER a Personal LO Lock is used, the OWNER of that lock(s) MUST be in POSSESSION of the SOLE KEY that will open that lock!!!
Step 1
A SINGLE authorized employee will identify the following:
- All the forms of Hazardous Energy and their magnitude that MUST be isolated
- The isolation devices and lockout devices necessary to secure these isolation devices in their SAFE positions
- The means/methods for relieving STORED energy (Chemical, air/gases, hydraulics, etc.)
- The means/methods that will be used to verify EACH form of Hazardous Energy that has been isolated is at a Zero Energy State (ZES)
Step 1 can be accomplished on some equipment/machinery via the specific written energy control procedure; however, not all equipment/machinery that requires maintenance/servicing tasks will come with a specific written energy control procedure. Some of our equipment/machinery is part of a “Complex Process,” and our lockout will be specific to the SCOPE of work associated with these “complex processes.” When we do not have a pre-written energy control procedure for the equipment/machinery AND our energy control needs do not meet ALL eight (8) of the requirements of the written procedures exception in Section 11.2 of our program, the Authorized Employee(s) will be required to utilize the “Energy Isolation Worksheet” discussed later in this procedure.
Step 2
The authorized employee will obtain the necessary number of BLUE – Field lockout locks and any necessary lockout devices to perform the lockout of each energy source needing to be isolated AND vents/drains that need to be secured in their OPEN position(s).
Step 3
The authorized employee, if qualified to do so, will use the Standard Operating Procedure(s) for the equipment/machinery to stop/shutdown the equipment/machine. If the authorized employee is NOT qualified to operate the equipment/machinery, he/she is responsible for locating a qualified employee and having the equipment/machinery properly shutdown and “turned off” by a qualified employee.
Step 4
The authorized employee will don the proper PPE for the prescribed area(s) he/she may need to access in order to perform the lockout, as well as needed PPE for the lockout (e.g., bleeding off energy sources such as chemicals and hazardous gases). This may include face shields, special gloves, respiratory protection, chemical clothing, hearing protection, safety glasses, and safety footwear.
Step 5
The authorized employee will place the isolation device(s) in the SAFE POSITION and apply the lockout device(s) with a BLUE – Field lockout lock and DANGER tag, which states their name, date, and the reason for the placement of the lock on the isolation device.
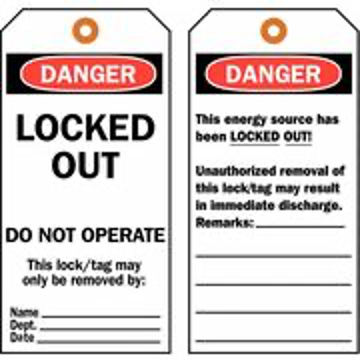
Option: If the authorized employee and the Supervisor who will be controlling the LOTO coordinate their efforts, the tags in the field could simply have a NUMBER stated in the “Remarks” section that will match the NUMBER on the SUPERVISORS TAG on the Lockbox. This will reduce work and time for the Authorized Employee applying the BLUE – Field lockout locks and DANGER tags. Either way, the “reason” for the LOTO must be identifiable either by each DANGER tag on a BLUE – Field lockout lock or by the NUMBER on the Tag that will be traceable back to the LOCKBOX associated with BLUE – Field lockout locks and DANGER tags. The Supervisor’s lock on the end of the Lockbox will STATE the purpose of the lockout AND the #1 that was used on the BLUE – Field lockout locks and DANGER tags.
The key(s) to the BLUE-Field lockout locks will be placed inside a RED COLORED Group lockbox, as shown below.
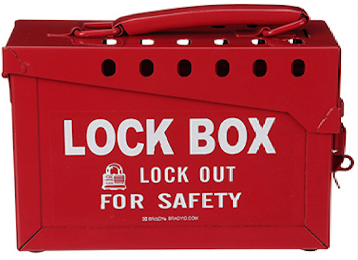
NOTE: Each Building/location will have the ability to use Keyed-Alike BLUE – Field lockout locks, or they may choose to have each BLUE-Field lockout lock keyed individually. Either way, the key(s) to the BLUE – Field lockout lock(s) used will be placed inside this RED COLORED Group lockbox.
Step 6
Once ALL of the energy isolation devices have been LOCKED OUT, their sources have been verified to be at a ZES, and ALL the BLUE – Field lockout lock(s) keys are in the Lockbox, the Supervisor responsible for the equipment/machinery will assume CONTROL over this Group Lockout by placing one of his/her RED – Personal lockout lock (with a DANGER TAG that contains their Name, a means to contact them, and the purpose of the LO) on the door clasp of the Lockbox, as shown below.
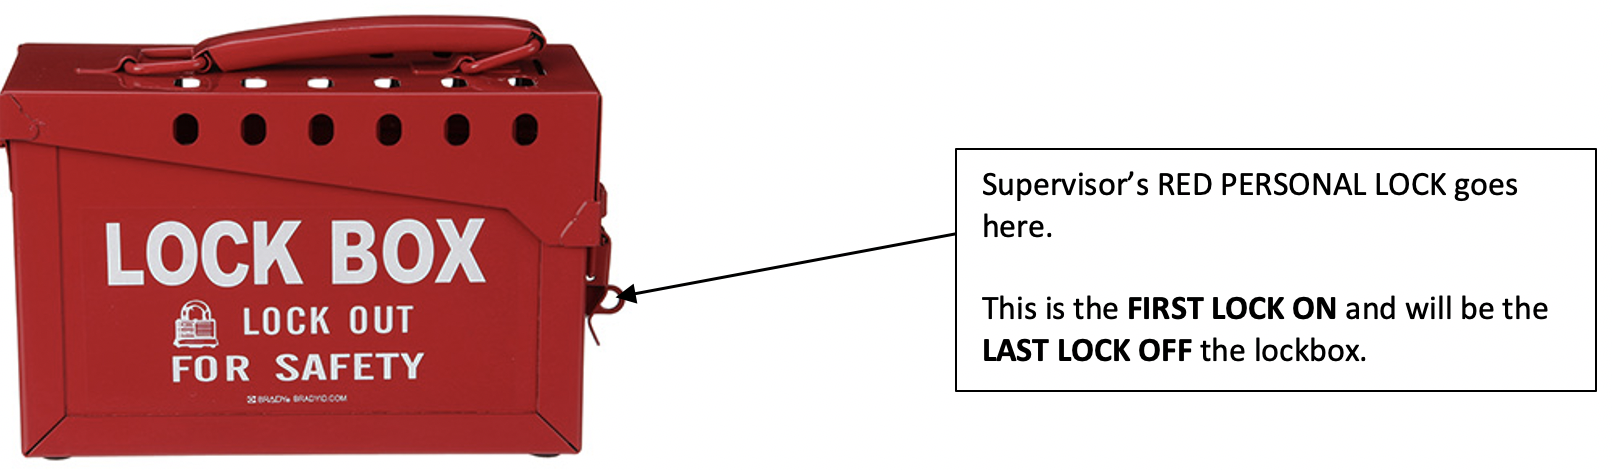
AFTER, and ONLY AFTER, the Supervisor has taken control of the GROUP LOCKOUT with the placement of their RED – Personal lockout lock their DANGER TAG on the door clasp of the Lockbox, other personnel who wish to perform servicing and maintenance on the equipment/machinery will FIRST, CHECK-IN with the Supervisor Controlling the Lockbox and when approved by this Supervisor, they will place their INDIVIDUALLY KEYED RED – Personal lockout lock on the side of the Lockbox, as shown below.
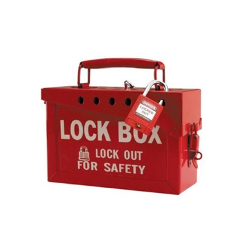
CAUTION! The above image is for demonstration purposes ONLY and does NOT show the supervisor’s lock on the lockbox. The RED personal lock may look different as well. Please see the written program for the exact visual depiction of our RED – Personal lockout lock.
EACH personal lock placed on the Group Lockbox must be accompanied by a “DANGER Tag,” as shown above, that contains the Lock Owner’s PRINTED Name and the date the lock was placed on the Lockbox. Contractors MUST ALSO include their COMPANY NAME and a 24-hour company phone number.
Step 7
When the servicing/maintenance is completed, and Operations wants to return the equipment/machine back to normal operations, it is the responsibility of the Supervisor-in-Control of the Lockbox to VERIFY that the equipment is ready to be unlocked. He/she MUST perform a walk down of the equipment/machine to ensure:
- Guards are back in place
- Interlocks, if involved, are functioning
- Labels are visible
- Insulated piping (hot or cold) is properly insulated per design
- Grounding and bonding that may have been disconnected is back in place
This list is NOT inclusive – it is the RESPONSIBILITY of the Supervisor-in-Control of the Lockbox to get the right people involved in this Return-To-Operation task to ensure the equipment/machine is SAFE to start.
- Ensure ALL personnel have checked out with him/her AND that they have removed their PERSONAL lockout lock from the Lockbox.
Once the Supervisor-in-Control of the Lockbox has satisfied that the equipment/machinery is safe to start up, he/she will REMOVE their Personal Lock from the door clasp of the Lockbox, allowing an Authorized Employee access to the BLUE – Field lockout lock(s) keys so that the lockout devices may be removed from the energy isolating devices and these isolating devices placed back into their operational positions. MAKE CERTAIN that ALL locked/tagged VENTS are returned to their operational positions (e.g., CLOSED)
It is the responsibility of the authorized employee(s) to return the BLUE-Field lockout locks to their storage location with the key(s) in the locks. If the location has chosen to use KEYED-A-LIKE locks, then the KEY must be carefully controlled/stored when the locks are not being used.
NOTE: if the sole key to this KEYED-A-LIKE BLUE Field locks is ever lost, we MUST destroy the locks. There can be NO spare keys for these KEYED-A-LIKE locks.
Shift Change in Group Lockbox Method
Shift change is easily managed using this group lockout method. The only change-over is for the Supervisors who will be transferring responsibility for the Control of the Lockbox. This transfer MUST BE MADE with BOTH supervisors present at the Lockbox at the same time. The Supervisor leaving will remove his/her RED – Personal lockout lock, and IMMEDIATELY following this removal, the Supervisor taking control of the Lockbox will apply his/her RED – Personal lockout lock and Tag to the Lockbox. If multiple lockboxes need to be transferred, each Lockbox will be done in the manner INDIVIDUALLY. Do NOT unlock all lockboxes at the same time and then allow the oncoming Supervisor to place their locks. We will do each lockbox individually until all the Locks have been transferred.
Keep in mind, this may have to happen on several lockboxes – but the procedure is the same for EACH TRANSFER. They are DONE one at a time, as described above.
It will be these Supervisor’s RED – Personal lockout lock(s) that will ensure continuity across shifts where no one is actually working on the equipment/machinery for a period of time. This is accomplished with the FIRST LOCK ON – LAST LOCK OFF practice, which ensures that a supervisor responsible for the equipment is ALWAYS in control of the lockout for their equipment.
So individuals who place their personal lockout locks on the Lockbox will CHECK-IN and OUT with the Supervisor BEFORE they begin work and if they have to stop work and leave the job BUT plan to return. They will place and remove their RED – Personal lockout lock ONLY after discussion with the Supervisor-in-Control of the Lockbox – EACH time the place or remove their personal Lockbox. Contractors will be managed, as stated below.
Contractors and Group Lockbox Method
Contractors have the “right” to ask for a “walk down” of the energy isolation. If this is requested, an authorized employee will use the machine-specific procedure or the energy isolation worksheet developed for the scope of work and walk down the Contractor SUPERVISOR for the job. The Contractor Supervisor will walk down the LOTO with his/her employees, who may request it.
The Company employee, or a properly trained designated company employee – could be the Supervisor responsible for the equipment/machine – who hired the contractor will MEET the Contractor Supervisor at the job location. The company employee responsible for the contractor crew on this job will contact the Supervisor in control of the Lockbox to “Check in” his/her contractor crew – ensuring they are using the CORRECT LOCKBOX. The company employee responsible for the contractor crew on this job will place a multi-lock hasp on a SINGLE lockout port on the side of the PROPER LOCKBOX. Once they are certain they have the correct Lockbox, the company employee responsible for the contractor crew on this job will place one of their RED – Personal lockout locks on the hasp in the top-left position (FIRST LOCK ON the hasp, and it will be the LAST LOCK OFF the contractor hasp). The DANGER tag that will accompany this company person’s lock will state their PRINTED Name, the Date they applied their lock, and IDENTIFY the Contractor they are CONTROLLING on the Lockbox.
NOTE: a single company employee may CONTROL multiple contractor groups – each group having their OWN hasp to place their locks, and EACH hasp will have a company employee responsible for the contractor crew on this job personal LO lock in the top-left position and will ALWAYS be the FIRST-ON/LAST-OFF lock from the contractor hasp.
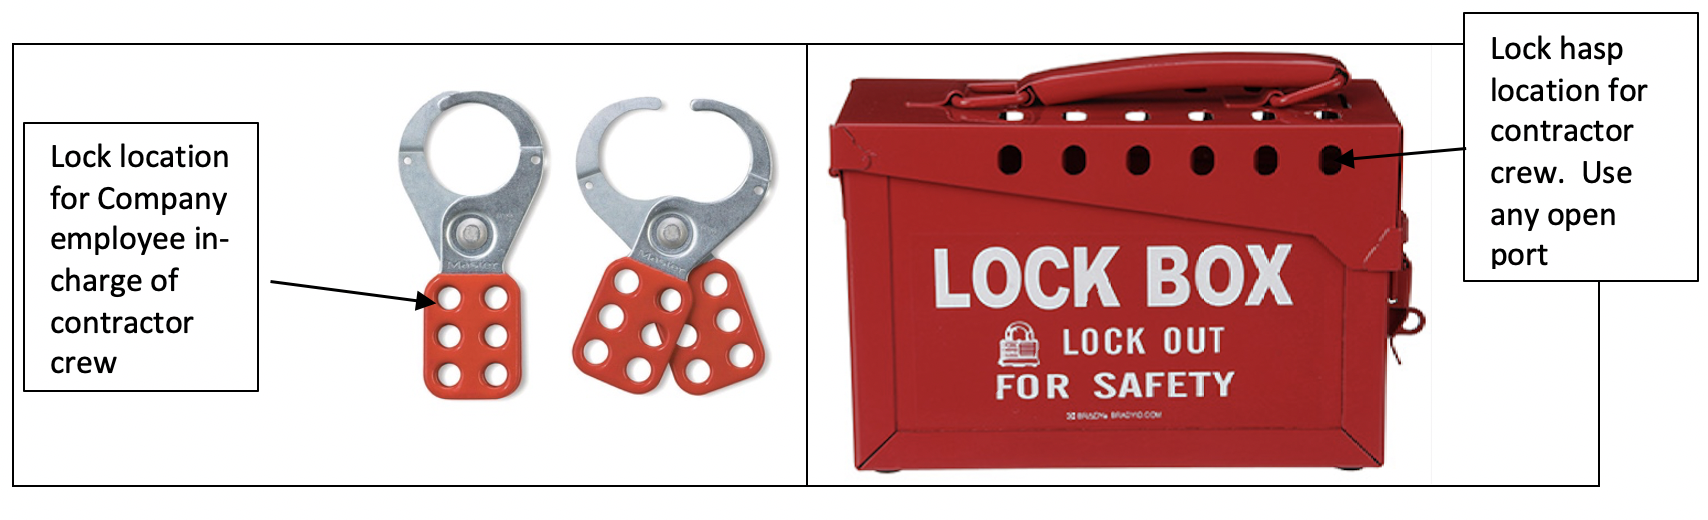
The Contractor Supervisor (there has to ALWAYS be someone assigned as the Supervisor for a work crew engaged in LOTO work) will place his/her personal lockout in the top-right position, and he/she will manage their personal lockout lock as a FIRST-ON/LAST-OFF lock from the hasp for his/her crew.
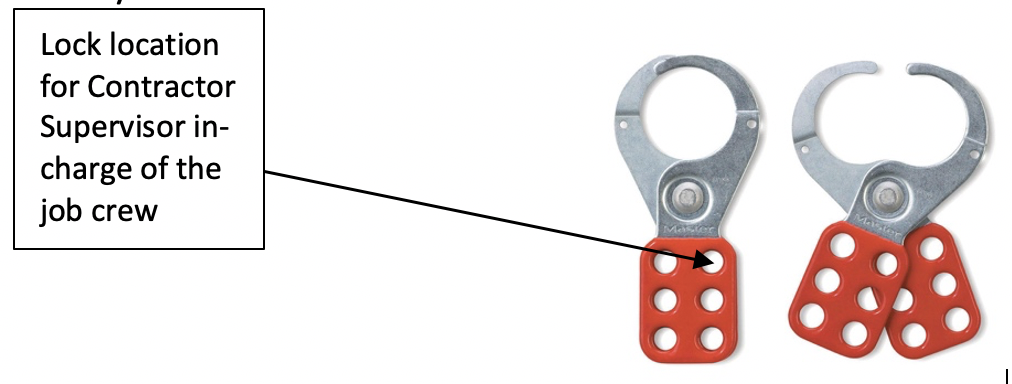
So BEFORE the company employee responsible for the contractor (s) removes his/her RED – Personal lockout lock from the contractor hasp, the contractor supervisor of the job will FIRST remove his/her lock indicating his/her crew is done with the scope of work associated with the LOTO and they are turning over the equipment/machine back to the company employee responsible for the contractor crew.
At this time, the company employee responsible for the contractor crew may remove his/her RED – Personal lockout lock from the contractor hasp and inform the Supervisor-in-Control of the Lockbox of this status.
NOTE: When a contractor is engaged in a lockout, there will be THREE (3) critical locks:
- The Supervisor Controlling the lockout will be on the lockbox door clasp
- The company employee responsible for the contractor crew will have their lock on the lock hasp (top left)
- Contractor crew supervisor lock on the top right of the hasp
EVEN if these three (3) individuals will NOT actually be working on the equipment/machinery, they WILL apply their personal lockout locks as stated above in order to CONTROL their equipment, project, and personnel they are responsible for.
NOTE: Contractors will NEVER apply their lockout locks on a field isolation device; they will ALWAYS use an assigned lockbox. This is required even if the contractor uses RED and/or BLUE locks in their Lockout program.
Multi-Hasp Lockout Devices
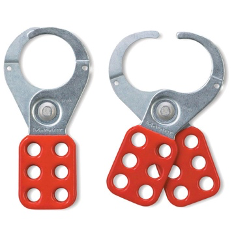
This is NOT a form of “Group Lockout”; it is merely converting a lockout device designed for a single lock into a device that can accept six (6) locks.
There are hasps that allow for more locks, but as a company, we use ONLY the six (6) lock hasps – if we have a need for more workers to participate in the lockout OR the work will involve contractors, we are to use the LOCKBOX method.
NOTE: we can daisy chain our “Six-lock-hasp” together when we need more lock openings when these hasps are used for contractors on a lockbox. We limit the use of a SINGLE hasp on a field isolation device so as not to damage our equipment by hanging hundreds of locks from an isolation device!
This method is helpful when the scope of the LOTO involves multiple isolation devices and six (6) and fewer authorized COMPANY employees. But this method STILL REQUIRES for EACH AUTHORIZED employee to place their RED – Personal lockout lock on EACH isolation device associated with the lockout. ANY DEVIATION from this practice MUST be approved by the Department Manager and EHS department. For example, a qualified electrical worker needs to work on the electric motor to a pump and will be potentially exposed to electrical energy. He/she is NOT exposed to the hazard associated with the other energy sources. So he/she ask if they can lockout ONLY the electrical disconnect and NOT lockout the other energy sources associated with the equipment/machine. This deviation must be approved by his/her department manager and the EHS group.